Wednesday, December 13, 2017

Decorations, Felt Ornaments & DIY sleep mask

Hello and happy holidays! Winter has arrived and we already have five inches of snowfall. The air is crisp and the birds are out in song. I wanted to share some of my holiday decorations inside and outside.

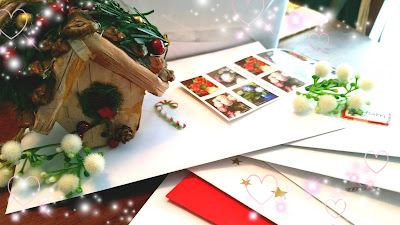
letters ready to send

metal rustic star, front door

My front door has a big red rustic star! I bought it plain (already painted) and surprisingly on discount for early December. I used wide ribbon and green bells to add a festive look. During other holidays I can switch the ribbons or put faux flowers on this. You can find most seasonal decorations at craft supply stores or even large shopping stores.


my wooden banner with lights (kitty is not for decoration, ha!)

I bought some lovely wooden banner pieces last year. They came plain and I glued scrap paper on the front, then cut around them. They come in many shapes to pick from too, so you can make some for other occasions or holidays. 

fawn on mantle

The branch tree also came plain. I made garland from fabric scraps and added some ribbon. The berries are faux and on little wires, so you can place them anywhere. These come in other shapes, sizes and are very affordable. Round of globe shaped ones could be hung from a ceiling and could even contain lights.

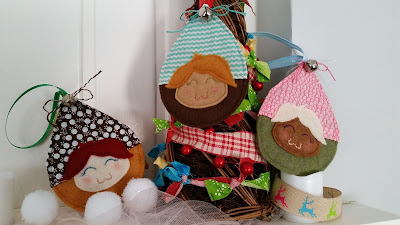
felt gnome ornaments

felt mistletoe

This year I made some new ornaments for my Etsy shop. The first three are gnome ornaments! Each is different and has delicate hand stitched faces. They have a small bell at the top and are about 4.5" in length. The felt mistletoe is available in two shades: dark sage and light sage. They have beautiful matte beads for berries. Each is topped by a glitter red ribbon and are about 5" in length. If you want to view more photos or make a purchase please visit my Etsy shop

Coming soon I will be sharing a DIY for beginners: sleep mask! If you follow me on Instagram you may have seen some photos up about it. I will be making a post devoted to the making of it, along with directions and photos. You can trace your current sleep mask for a pattern or sketch your own (I promise it's not difficult!). And you will be able to use scrap fabric or just fat quarters. 

So that should catch you up for this month of crafting! I hope you are having a festive season with sweet treats and much crafting.



Thursday, November 23, 2017

DIY holiday garland & Shop Local/Support Handmade


It's that time of year ~ time to break out some seasonal decorations! Each year I do enjoy making something new. But to start, I am putting up a faux berry & fruit garland I made. This is a very easy do it yourself project for the beginner! Almost every craft store will start to bring out the holiday decorations and supplies. They might have leaves, fruits, berries, flowers and pine (all faux) in bags or sold as a pack. It's easy enough as picking out what you like and stringing them together. Many are made with foam as the main body, such as the ones in my photo. So it's easy to use a large needle and thread to make the garland. As an added decoration to the garland, I used cut pieces of ribbon tied on every few inches.


faux berry & fruit garland

As winter approaches I will begin to put more up and will share them! Including my new front door decoration this year: a rustic metal star. But now for a bit of 'shop local' this year!

Every year I encourage shoppers to consider buying from small local businesses. This year is no different with small business Saturday coming up. This is held each year to encourage people to go out to their own small shops within their town or city. By shopping small you help support local business & local artisans. You can also do this through websites such as Etsy, Artfire and more. When you buy from an Etsy seller such as myself  help skilled artisans, seamstresses and crafters. I use my skilled trade to create products that are high quality and learnt from three generations of family. You also help by reducing how far a product must travel to reach you PLUS you get sweat-shop free goods!


fair trade small business locally

I went out earlier this week to avoid the chaos of shoppers. I was happily surprised to find a small shop devoted local artists & fair trade goods for sale. They had local artists and crafters goods for sale with the promise of everything being sweat-shop free. You might be surprised to learn how many brands today are made in sweatshops. But don't fret, many high quality brands are made without the use of dangerous sweat shops (and sadly, child labor) such as these brands. Be sure to do some research if you want to try and support well made, ethical brands this holiday shopping season.


Monday, October 30, 2017

A handmade Halloween

A fun & frightful Halloween to you! I hope you are in the holiday spirit and ready for a evening of trick-or-treating, maybe you prefer a scary movie marathon or going to parties. This year I wanted to show some of the Halloween decoration I have made in the past. And a glimpse at the Halloween costumes my spouse and I are wearing this year.


I love lanterns and used paper bags for jack-o-lanterns. You simply cut the face or design onto one side, then spray the bag with glitter. I use battery powered candles inside, so no fire risk here! The cute skeleton was a bought plain wooden decoration. I painted it with acrylic paint and used a all-weather purpose sealant. I then added a bow and some tulle to it. But my large hanging ghost is made from scrap fabric I had. You make it like a pillow case, I used felt for the eyes and mouth - and just poke a hole at the top. 


To fill the ghost body, I take a old plastic bag and stuff it with whatever I have: other plastic bags, some stuffing or even crinkled up paper. I use a stick to make the 'arms' stay out. If you want to view a video of it, please visit my Instagram page. 

And now to marvel at this years Halloween costumes! Our costumes are part thrift store part handmade. The capes are handmade and I'm very proud of them. This year our design was Sith Lord and Apprentice from Star Wars. It was so much fun dressing up and I took our photos. I also did our makeup for them as well. 


The Force is strong in us! I hope you have a fun Halloween and get many sweet treats. 


Tuesday, September 26, 2017

Finished ~ sage green dress

It took me months, but it is finally done! The sage green full length dress is finished! It had been put on hold several times due to fostering adorable kittens (see previous posts) and just needing the space in my craft room to lay out such loooong pattern and fabric pieces.

This was the first sewing on my dress. I had done the back zipper and was trying it on for fit. To anyone who sews, you may already know that pattern sizes aren't 100% accurate. I used Simplicity pattern 1137, misses & women's sizes. But even with my measurements the fabric had more stretch to it then I anticipated. I had to bring in the bust and torso and bring the hem up by at least 3"s. 


I also decided to give this dress a square neck. I wanted something delicate but with ribbon. I found a beautiful ribbon with gold thread and sewed this on completely by hand. Don't be afraid to add embellishments and decorations that suit your taste. The actual pattern suggests flowers (the pattern includes directions) at the neckline. But you could add lace, embroidery or even jewels. This pattern can be a challenge if you are unfamiliar with sewing clothing. I'd suggest it for intermediate or those comfortable with sewing & altering their own clothes. 

And hey cool cats ~ I'm on Instagram now! Just follow my link and the new icon on my page to follow me. I include current DIY, short videos on projects and always a pet photo (or five). Here it is: Craftinessbyb on Instagram 


Wednesday, August 2, 2017

DIY from scrap to hair clip!

Hello, how have you been? It's the dog days of summer and it's just winding down now. Hot, humid and cooler in the evenings. The pets want to nap all day and I don't blame them!

What I have today is a DIY project from scraps you might have in your craft supplies. Every now and then we buy something that had a big flower, button or decoration on it. So I remove these and set them aside for some later use. I had a thrifted top that had some large decoration in fabric, I took one off. I decided it would make a great hair clip and almost resemble a fascinator.

scrap fabric and old earring

So above is the scrap piece from the thrifted top. It's almost like a deconstructed flower with pretty lace, raw edges and quite large. I wanted to add to this and again picked through some of my craft supplies. I found an old clip-on earring with no mate. I used some pliers to remove the earring from it's backing and laid them out. I also had an old mis-match barrette and that is what we will be using for this.

the back of the scrap piece we will turn into a hair clip


Now, before we decorate our scrap piece we need to make a back for it and attach the barrette. Turn your scrap piece upside down, so the back is facing up. Trace around the shape roughly and cut it out. 

cut out felt piece

this part will clip to your hair

I cut a small slit in the felt to allow part of the hair barrette to slip in (see above). This just helps hide it from view and lets you stitch it to the felt piece. 


Turn your felt piece over and stitch the barrette to the felt. I simply stitched around the metal to make sure it's secure. If you can not stitch your barrette to your felt, you can use glue. I would suggest a glue for metal or plastic and lets you attach it to felt. A very good crafting glue for many types or material is E6000. It can be used on metal, jewelry, fabric and plastics. 

now for the added decoration!

Once you have the felt attached (stitched or glued on) it's onto the next fun part! Take your decorative piece that you are going to be using. Remember I had that old earring I took apart? I took the beads and laid them out until I liked how they looked. I decided to stitch the beads to my fabric piece. If you are unable to attach decorations with thread you can always use that same glue I mentioned above (the E6000 or other fabric glue). 

You take your decorated piece, as mine is seen above (in the photo) and you will attach that felt backing to it. Now you can easily glue the felt backing (with the sewn/glued barrette) to your decorative piece. Be sure to let it dry well, often left to dry over night. 

You can repeat this for almost any number of materials! You can use tulle, netting, ole scraps of fabric and more. Play around, lay them out, glue or stitch and create something new!

finished piece

I hope you enjoyed this fun DIY project! I will certainly have more to come. But for now, I'm trying to cut a full length dress pattern and perhaps crochet some. Enjoy the end of the summer months friends!


Saturday, June 17, 2017

Natural fabric dye & fostering

Hello and welcome to Summer! The heat is on, the evenings are longer and the days are relaxing. I decided to give something a try which I have never done before, natural fabric dye. The idea behind this is to try alternatives to traditional chemical dyes. You can find many posts online dedicated to this practice with many ways to do it. I tried a method of soaking the fabric in white vinegar for a few hours, rinse, then try to dye it.

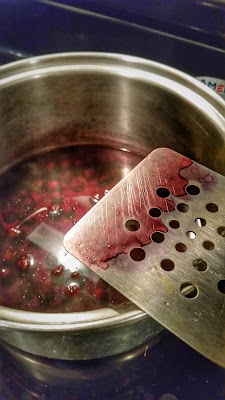
boiling blueberries

I would boil some fruit such as blueberries (I also tried spinach for green and turmeric for yellow) and place the cotton whit fabric in the boiling pot for about an hour. 

straining turmeric

I then let the fabric soak in the colored dye water for a few hours, rinse in water and line dry. But how did it go? Well after I gave them a second rinse the color hadn't taken very well. I think in the future I will have to try a different method for this. Because as you can see, after the first rinse and line drying, they color was quite bright.

sadly the spinach for green ended up a pale yellow

But what else is going on in my home? Good thing you asked, because....

foster kitten Sherlock
foster kitten Watson

Meet my foster kittens! About 7 weeks of age about now and starting to explore my home. I named them, if only for a way to address them beyond "kitten 1 & 2" since most shelters tend to re-name kittens when they are ready for adoption. So please meet grey & white Watson and all grey Sherlock. 
Now I've been doing this for over six years now. Shelters of all types often need volunteers with the space and time to open their home to homeless pets. They are not always young, some can be several years old. They could have been feral, from a family that could not care for a litter or a surrender-by-owner situation. And it's not just cats but dogs, rabbits and other animals that need foster care with shelters nationwide. I specialize in socializing cats, correcting behavior (with positive reinforcement, such as take them directly to a scratching post to learn it) and how to live in a household that can be busy, noisy and have other pets. 

our dog Choji relaxing with Watson

So if you ever want to help locally I'd suggest finding a shelter and stopping in. You may be required to take a course (often for free or a small fee), some shelters ask you to supply litter and cat food (others supply it for you) and they may have their own guidelines to follow. I can share pictures but I can not reveal the shelter name or when these two are available as per their guidelines. But if you have the time and space to spare, do consider giving back to your community and volunteering with a shelter!


Tuesday, May 2, 2017

DIY from barrette to headband (crystals)

Hello, happy Beltane to those who observe it! Spring has arrived and the birds sing, the trees are in bloom and the flowers are beautiful.


So this DIY I'm sharing is something I tried and it worked. I simply had a big, bulky barrette with crystals on it and wanted a headband instead! You will need a piece of hair decoration that you want to transform into something else. I had the barrette and I also had a spare plain headband. You will need pliers and some jewelry wire for this as well. I used some ribbon at the end but that's optional. 

First step is to remove the crystals (or maybe you found one with beads) using the pliers. Place the removed paces aside - be careful to not poke yourself with exposed wire!

supplies all ready

remove pieces and set aside

Now with your crystals all removed, you can decide how you want them arranged on your headband. I simply laid my headband on the table and started to place the crystals how I liked them. They could be in order of size or shape, whatever you prefer.

place your pieces how you like

Now the jewelry wire comes into play. You will need to twist a end of the wire around the headband, then proceed to add a crystal. You add a crystal, twist wire around headband once, then add a crystal. You do this until all the pieces are attached to the headband.

crystals wired onto headband

The optional part is you can leave this with the wire exposed or you can cover it. I covered my wire with some ribbon that matched the headband (in this case, brown). I started at one end and I decided to glue the ribbon on with a dot of glue. I let it dry, then wrapped the ribbon over the exposed wire - all the way across the headband. I simply glued it again at the other end. An alternate is to stitch the ribbon on, wrap, then stitch again. 

I used E6000 glue

the ribbon is wrapped!

I am so pleased with how this came out! It's not bulky and uncomfortable as it was when the crystals where on the barrette. You can do this to many things, perhaps an old necklace with beads you'd like on a headband. 

my calico kitty approves

the finished piece


I hope you've enjoyed this DIY and want to try making some new things. It's fairly easy to make and doesn't require much in supplies. It stayed on well and I might try this again sometime. I hope you have a good start to May! Be sure to check out my photography, my Pinterest & Etsy shop!


Saturday, March 25, 2017

Altering a bought dress, Spring equinox

Hello everyone, I hope spring has found you! The weather is warming, birds are out daily and flowers are sprouting up everywhere. After a long harsh winter I think we could all use some sunshine. Thinking of sunny days ahead, I am going to share how I've been altering a bought dress.

I think like many women, you sometimes find a beautiful dress but it just doesn't fit quite right. It could be too big in one area but too tight in others. The straps could be too long or short. Maybe the hem line isn't what you hoped for but the rest is a perfect fit! So what do you do when this happens? You go about learning how to alter the dress.

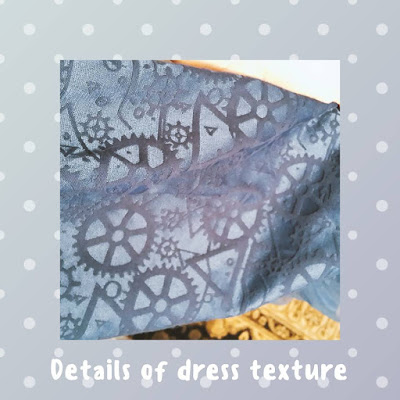
I bought this lovely dress from a store and it had everything I wanted: a navy blue color, soft embossed print, cinch at the waist but... it was too large in the bust and the straps are far too long for me.

Yes, that says 'police box' on the waist band!

If you didn't know before you sure know now - I'm a nerdy kind of girl. I love Doctor Who and was beside myself upon finding this dress! It resembles the TARDIS and has this lovely tulle at the hem line. As you will see in my photos it has black piping on the bust and that is where I decided to pin the bust in some. 


I have a dress form, it's a way to size clothing to your exact measurements. It's very handy and they frequently go on sale at many craft supply stores. I placed my dress on the form and pinned it in areas that were too large or baggy. I then tried it on to make doubly sure it was just right. I am stitching this by hand with a curved needle, sometimes sold as an upholstery needle. But they do make small ones for working on clothing and they are about 1 1/2"s in length or more. Using a curved needle while your dress is on the dress form makes this project very easy. I am sewing it at the black piping and the new stitches are not visible.

You can apply this method for most any bought clothing that you need to fit your measurements correctly. If you do not have a dress form you can carefully pin the article of clothing while you wear it. And this can be easier if you have a helper to pin areas for you, so you can stand up straight while wearing it. To add width is a different post I'm afraid and I do plan to share how to someday. It's often not as difficult as it sounds. But to take in clothing, this can be done by a novice with just a bit of guidance and practice!


As spring has sprung so has my desire to decorate for the new season! I have a mantle above my fireplace and was so pleased to decorate for the spring equinox. I included two faux birds in their nest, tulips and other brightly colored flora to welcome the new season. 


I hope you have sunny days ahead and April showers soon ~ check back soon for some new posts. And be sure to pay my new photography page on Facebook a visit, it is: Bertha Bee Photography. Stop by to show your support for us small photographers & artisans. 

Wednesday, February 22, 2017

Spring in my back yard

Unlike some of my friends and family, we did not get a massive amount of snow this winter. We certainly are not under a three foot pile of snow right now, and it's nearing the end of February! It is warmer this year at this very time then last year. Last year we had an ice storm and temperatures so cold it was below freezing wind chills. This year we have had.... several 55°F (12°C) days a week now. 
So this post I am sharing spring as it is showing up in my back yard. I have many wildflowers showing up and some I'm not certain about. 


The above are Snowdrop flowers. They are perennial plants and begin to flower after being under snow for sometime. The flower faces stay facing downward and are a bright white color with green centers. 


A few patches of purple Crocus have also shown up! Crocus are part of the Iris family of flowers. They are the signal that spring is coming and bring a parade of colorful flowers. You might see them show up in yellows, white, purples or pink colors. The spice saffron is derived from a type of crocus that blooms in the autumn. 


I hope spring finds you well and you are eager for green grass, flowers in bloom and chirping birds!