Friday, December 18, 2015

Star Wars Snowflakes DIY

May the Force Be with You! Oh yes, I am 'that' nerdy/geeky friend who is in fact giddy with happiness over going to the movie theatre! Usually my spouse and I rarely go, since it costs over $20 for two adult tickets (forget buying the snacks, I'm not The Empire rich!).

scottparkillustration.tumblr


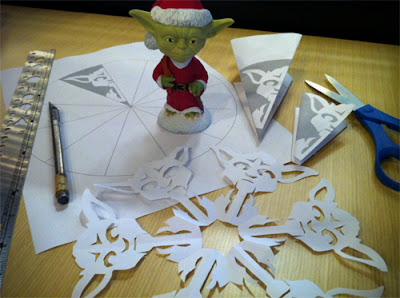
To get you in the spirit of the fun, here are some cool DIY paper snowflakes - Star Wars themed! This rad dude named Anthony Herra designed these, free of use. Here is the direct link to his AnthonyHerraDesigns website with instructions and downloads to print then cut.

Here are samples of images from online, all sources sited.

www.wikihow.com


This is something I feel kids will find difficult. I had to trace the cut pieces on several folded areas to get the shape cut nicely. And you use an exacto knife, much easier then tiny scissors. It took at least one practice snowflake for me to get one looking nice. But it sure is fun and they are very large, they fit a 11 x 8" paper. You can print the pdf to cut from if you follow the link in the website listed. Have fun, be sure to decorate those droids nice! 

Thursday, November 26, 2015

This season - BUY Handmade

This year, instead of something you can buy that everyone else will have ~ why not try ᏂaᏁDᎷaᎴᏋ, local & small businesses. 

It's not going to be "cheap" and rarely on sale. You are buying quality gifts, by skilled craftsmen & artisans. The gift didn't go through hundreds of hands, in a sweat shop, in a foreign country, traveling thousands of miles to a store. 


It is local, USA made, by a person who knows and practices a skilled trade. 
My own shop is stocked and ready, so are others on Etsy :: Meylah :: ArtFire and more online shops. 


I do CፈᏬᏕᏖᎧᎷ orders, please inquire early! 
 www.CraftinessbyB.etsy.com


Monday, November 2, 2015

Cat rescue group, bandannas

The cat group I took a hiatus from in early summer? Well, I've returned! Can't stay away from those homeless kitties for too long. I'm helping with adoption events and some sewing. They have additional sewing & crafty volunteers, so I am not overwhelmed by the requests.


So here are a few photos of them in the stylish bandanna I am making. They are on lingerie elastic, so they are never tight and fit like a collar.


This white kitty is my own cat, Howl. He pretty much models anything I make ~ he loves the attention and not having to get up.


Tuesday, October 13, 2015

What I'm working on

Sorry I haven't shared anything for a while! I get busy, start new things and have twice weekly stuff to attend. Somehow in all this I manage to start some new work for my crafty shop.

Felt charms, in the works!

I made a charm for my purse, ever since I get compliments and questions. So I decided to make a few charms that I will sell in my etsy shop. They are inspired by some favorite animated films ~ I hope you recognize them! 

Can you guess who it is?

We are also getting ready for some Halloween fun-time! Each year there is plenty to do where we live, like corn mazes or haunted houses. There is a pretty cool jack o lantern event that - people, get this - is an hour long line to get in! But it's worth it, it's so much fun to go view. But until I have some neat photos of those, here is my cat in his dinosaur costume.

Roar, I'm a vicious snuggling kitty! 


Thursday, September 17, 2015

Follow me on Tumblr

I have joined the popular, far-too-much-time-on-it bloggy land of tumblr. I have a little blog of my daily musing which is heavy on photos and gifs. It's also full of cute animal pictures, some earth friendly things I try and random bouts of food I want to eat!
So head on over for a visit. If you follow me, I will likely follow you back. Here it is, my tiny space on the interwebs 'Namaste Life of Bee'


Wednesday, September 9, 2015

Etsy shop on Vacation

My Etsy shop is on vacation mode until about early October. I have new things to photograph and list. I am also moving my crafty office around. I even have new patterns I'd love to make some items of and list before the holidays.


So stay tuned for when I re-open! Support local artisans, support handmade ~


Wednesday, August 26, 2015

Scalloped edge DIY shorts

Hi everyone, how are you? Summer is packing it's bags and heading out. My garden is ready to be turned down for another year. The leaves on trees are just showing signs of changing color of foliage. But before we leave summer behind, the last shorts DIY!
I had shorts I just found were too long in length. I decided it was time to make them fancy! You will need some fabric markers or chalk, an object with a round edge (such as a glass or cup), scissors and bias tape for the edge.

First, decide where on the shorts you want the scalloped edge. You may want it higher then the hem of the shorts or right on the hem - it's up to you. Next take your round edge item (I used a glass) and place it by the hem. Trace with the fabric marker/chalk to draw a half circle. Repeat this step around the leg opening.

Cut the traced scalloped edge. You can use bias tape which comes folded for you - or, I used colored lingerie elastic. You will then pin around the edge and you may: sew it by machine Or sew by hand. I did mine by hand since the elastic is a tad silky (and slipper) on the sewing machine.

sewing edge by hand

It's that simple to complete! It's a fun way to make your clothing unique and personalize. It's also resourceful and you don't need to purchase new styles. 


I hope to be involved in some craft fairs this holiday season. So I will mention where and when as that time approaches. Otherwise I have some new patterns I might be sewing and offering to customize in my Etsy shop. Until then, welcome autumn weather! Pumpkin spice everything! 


Monday, July 27, 2015

N E W S and upcoming DIY project

News to share ~ super excited to have ordered some new fancy business cards! This is a screenshot of what I picked and it will have more detailed info on it. I used Vista Print online for my cards, which gives you options such as: use your own logo, info to add to card, place info on both sides, use a photo, add matching items during your order. If you visit Vista Print now, you can use a savings code SAVEBIG for a discount on select order. I don't get any brownie points for sharing bout certain blogs (I wish I did!) and simply wanted to give a thumbs up to this place. I also will have a Google number to share for my business.


And when I get to it, since I like to share lots of pics, a DIY project for scalloped shorts! I had seen some in the stores this summer but frowned upon the price (umm... $50 for shorts?!) and decided to use a plain navy pair I owned. You will need shorts you can alter, a cup or mug (to draw the scalloped edge) and I used lingerie elastic for the edges (but biased tape is fine). So that will be my next post, all about making your plain summer shorts into something more fancy. Have fun in the summer sun everyone! 

Wednesday, July 8, 2015

Muggy days DIY hemmed shorts

It's muggy people, we are in the full swing of summer now! We have had a lot of rain over here, a few times roads flooded. But it's been wonderful for my garden ~ I do love my fresh vegetables!

Everybody, grab a raft and swim in the roads!

I've started to offer my seamstress services to my local friends. Wow, has it taken off! Word gets around fast nowadays and I've had several friends in my first 3 weeks of seamstress work. I have also had friends-of-friends who wanted me to hem, mend or alter things. I am working on getting a Google phone number to allow people to contact me by phone. That way I can keep my own cell number private but still have a way for customers to contact me directly. 


hemming pants


Along with my new seamstress work I hope to participate in a craft fair or two this holiday season. I haven't done one in years and am so out of the loop. But I want to make some holiday themed gifts to sell. And plushie style toys, I adore making cute things for all ages to enjoy! I still need to decide just what to make for it, since I have piles of patterns to pick from. 

DIY add length to shorts project!
Here are some shorts from the thrift store I added length to. It's a very easy thing to do with a sewing machine or simply by hand stitching. 
- First pick a type of fabric for the added length. I picked a cotton fabric with some blue to match my shorts. Measure around the shorts leg opening, be sure to add about 2"s to the measurement for some wiggle room.
- I took my cotton fabric, decided I wanted it about 2 1/2"s in width (length was my measurement I took around leg opening, refer to above). Cut the cotton fabric, set aside. 
- Turn your shorts inside out and decided where you want to sew the fabric on - I decided about 1" on the shorts opening. I used pins to mark this but you can use fabric chalk or fabric markers. 

My plastic clear ruler I use for measuring.

- I took my cotton fabric I had previously cut and turned under about 1/2" and stitched it with my machine, this will be the new leg opening and will not fray. 
- Remember how you marked the 1" on the shorts? Take the un-stitched edge of your cotton fabric, pin to the 1" line on the shorts leg opening. Sew across, sew edges (it will be a loop now) then repeat to other leg opening.


My shorts where a thrift store purchase, the new hem came to about 2"s after sewing. 

Ready for summer!

I hope you have fun altering your own thrift store and summer attire! Please visit my shop for hand made, hand crafted artisan gifts. Support the small businesses online and keep the arts alive!


Monday, June 8, 2015

Summer S A L E ~ 6/8 to 6/28

To celebrate over 12,000 page views of my blog ~ it's a summer SALE! Visit my Craftiness by B shop on etsy, place any order over $12 (not including shipping cost) and use code: SummerLuv12 to receive 12% discount!


I hope to make some summer sales and get ready to bring in some new stock by autumn.

Monday, May 11, 2015

Crafting up new things!

Hi everyone, how has it been? Spring is quickly turning to summer weather here. Very warm weather which brings storms and the occasional tornado warning. But the weather helps my garden thrive and grow!

I have two garden boxes

my pea stalks

I've also been enjoying those great vintage Simplicity patterns I bought months back. I found some based on vintage bathing suit style halter tops. If you have some basic sewing skills you can make these! The only challenge would be adjusting the bust if you need to, which you can find help here at Curvy Sewing Collective blog.

Simplicity pattern 1426


I picked cotton prints to make these with. The pattern does call for a fabric as the lining, so you can use other fabric beyond cotton. But really now, look at the poodle print?! I want to make a bathing suit top with that print, it's so cute! And these require very little notions, it calls for either snaps or buttons for the back closure. Otherwise the straps tie at your neck or the patterns allow you to sew the straps to the back (as a traditional bra-style). 

If you are on Twitter be sure to find me on there! I try to update it weekly with a few new pictures, maybe a link to crafty projects and little things. 


Tuesday, April 7, 2015

2nd video is up, spring time

Happy Spring everyone! The rain has arrived and it will surely bring May showers our way. Some thunder storms are expected in my area for the rest of this week.

April showers bring May flowers
My new YouTube channel is up and running! I added a 2nd video of a DIY bunny basket you can make. Follow this LINK to view it. You need some basic sewing knowledge and sewing machine with some flat 8" x 11" felt to work with. It's a fun project for an afternoon and you can make it from your own sketch. 

finished bunny bag

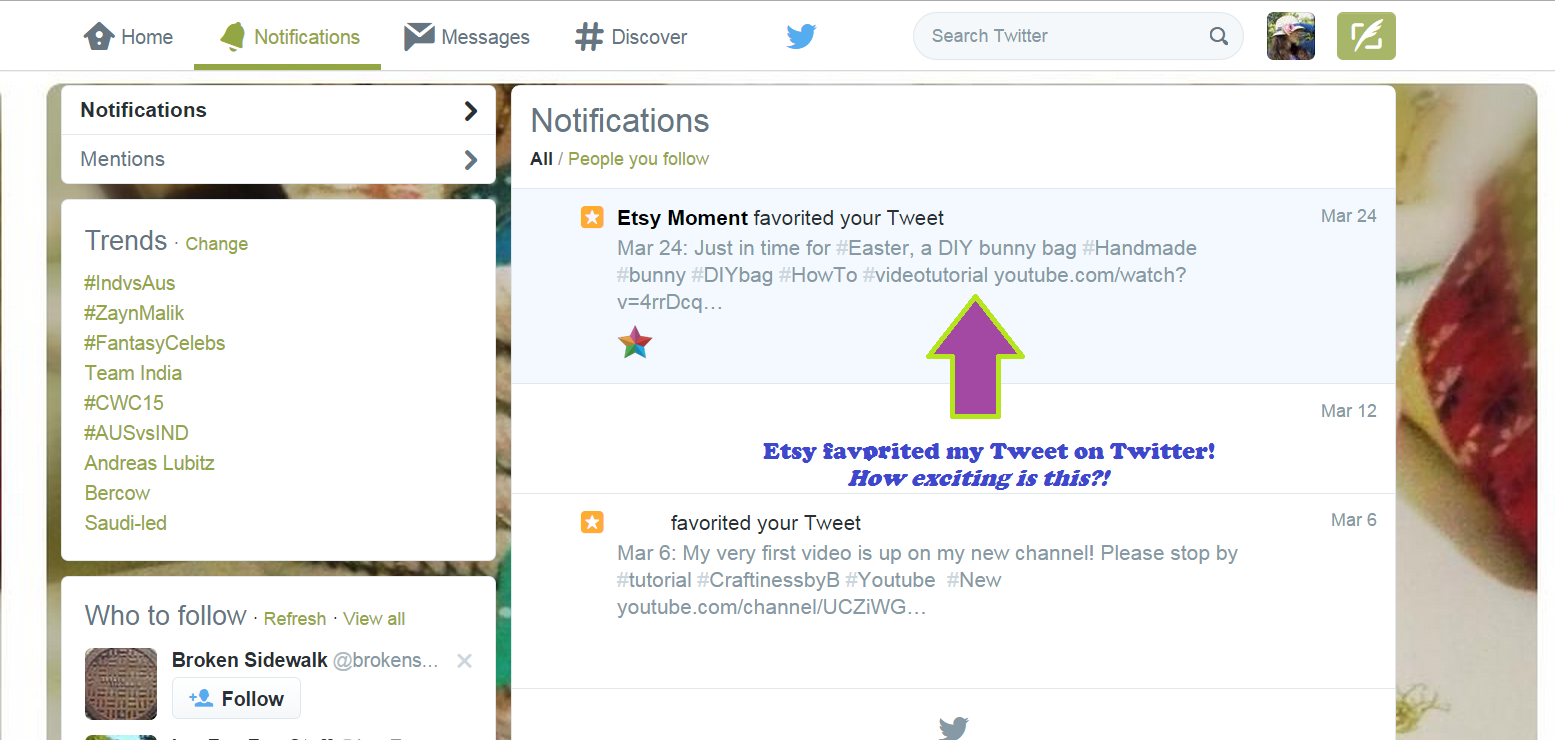
And I am on Twitter sharing my photos of my handmade items on Etsy. I've only been active a short time now but guess what? I already was noticed by an Etsy page on Twitter! They saw and liked one of my tweets ~ I feel special for just a moment!

I hope to continue to update all my social media pages for my followers and fans to enjoy. I still enjoy taking special request custom orders. You can contact me via my Etsy shop if you wanted a custom order. 

Wednesday, March 18, 2015

First video is up!

It is up and ready for viewing ~ my first YouTube channel video! I'm so excited that I was even able to edit and make this. I know zip about video editing and found a easy, free app to use. My first video was about felting since it was a project I was working on. Here is the link to my YouTube channel and the video.

view of my channel

My channel is public and I will keep it for all ages (so PG content). I want to offer tips, tricks and how-to videos. I have a sneak peek video then the full one up. It's likely to be in that order for each new video: a sneak peek one, then the full one. And fair warning, expect to see my pets often! They are too funny and cute to not share little clips of from time to time. 

My next video might be about making a paper kite that you paint or draw, then piece together. I found a wonderful style rokkaku kite that is Japanese. It is almost a diamond shape and easy to assemble! I love going to the local park and flying my kite on sunny, breezy days. Hopefully when I finish it I can show video of it flying!

soon to be in my Etsy shop!

And listing this week in my Etsy shop, handmade flannel pocket warmers! I made mine with flannel and the back has a cute heart design. They will be a set of 2 total (as seen above). They are filled with dry lentil beans and you warm them in the microwave for 15 seconds. They are great for chilly days or even if you have cold hands in general. They are a decent size and can also be chilled in the freezer for placing on your head if - for example - you have a headache and cool compress helps relieve it. I hope to offer more like these in larger sizes, such as a eye mask style or even a neck wrap. 


Thursday, March 5, 2015

Baby shower gifts, YouTube & Thank You!

This snow.... it's March, where is this "Spring" they speak of? It's probably under the foot of snow we had last night. Observe, my back deck.....

go away winter!
At least this weather came after the baby shower I attended. As always, it was a lot of fun to see my friends and spend time with them. There was dancing (our party had kids & teenagers) wonderful homemade food and conversations. I think I ate enough sweet treats to attract humming birds for a week.

two friends expecting boys
I asked each friend what colors or prints they would like. I lucked out that they each are having boys! So solid blue fleece with different flannel prints. I had enough time and leftover fabric to make each a simply teddy bear. I embroidered the faces on since these were gifts for infants. 

two teddy bears, ready to go!
I had a good time preparing and sewing the gifts. If I can make it handmade as a gift, I will. It's not just any day you can find a small local shop that sells such items. Even if you can only knit a scarf, it's a gift made by you with your hands and it's very meaningful. The recipient will be delighted by something you made special just for them.

In other news, I've decided to try my hand at YouTube. I need to set up my channel and figure out the fine art of editing videos. The first video will be showing how I mange to add ears to a felted kitty project. My methods are self-taught and work for me, so I figured I'd share them. 

I have also started on Twitter and Google+ under my shop name, CraftinessbyB. So please stop on by if you frequent those social media spots. I'd enjoy having some new followers and meeting new people. 

Where to find me online:

~ my shop on Etsy as CraftinessbyB

~ my account on Twitter as CraftinessbyB

~ my page on Google+ as CraftinessbyB

~ my page on Pinterest as CraftinessbyB

I will not have a page on Facebook as of this time. In the past I found too many 'trolls' frequented my page and harassed me. I'm a single shop owner in a vast sea of shop owners. I make quality, handmade, all done by my hands, items to sell. I do this because I have a passion for it, skills (I've learned from 3 generations of family, I have my college degree in graphic design) and a desire to offer handmade items at affordable prices. 
I also do this because I am often home bound due to a medical condition. In fact, my medical condition (known as Fibromyalgia, aka Fibro) has inspired me to began making and selling re-heatable body wraps for the neck and back. If I can make them unique, attractive and useful for those who need them ~ I will. I will try my best to offer them soon in 2015! 

So please be patient with me as I start to be on social media more, get my YouTube channel started and offer more unique, handmade items in my shop. My page has had over 11,400 views thus far ~ knowing people enjoy my blog and visit my pages inspires me to keep moving forward in my crafting pursuits. Thank you everyone! 

image from torontowlhd.ca


Thursday, February 5, 2015

Coming soon & DIY pocket warmers!

The days are colder with some icy wind chill here. But I can't complain too much, we only have a dusting of snow. Where as the Northern states have been hit again and again with some big North Eastern storms - some piling as much as 30"s in one night!

dusting of snow

I've made a very 'handy' project already for placing in your mittens of gloves before going outdoors. You might know them as pocket warmers or hand warmers, either way - they are a smart way to stay warm! I found a lovely blog post with instructions for you to enjoy, so please visit RaeannKelly in this handy link {see what I did there?}. When I made my own I used lentil beans instead of rice, but it seems either will work fine. When I heat mine up to warm them, I heated them at 15 seconds in the microwave. Be sure to heat them in short intervals because these can get very HOT and you could accidentally get burnt! For those with small children, please test the pocket/hand warmers yourself first.
my cotton fabric, lentil bean, hand warmers

And I have decided to start selling some new items in my shop. I have an abundant supply of cute, adorable ribbons. I honestly do ~ I find them and buy them, then they just never get used (but oh, do they look cute!). I will be selling them by the 1/2 yard, which is 18 inches length or 45 centimeters (well 45.72 to be exact). I have so many to sell with a various array of brightly colored prints on them. 
I have: mini taxi cabs, mini trucks, loopy hearts, cupcakes, Sakura blossoms, red cardinals and an "I love bacon" one and more. Needless to say, today I am photographing what I plan to list and sell shortly. I am using natural sunlight since I feel it captures the true colors ribbon. 

my selection of ribbons
I hope all is well for my readers. I know how tough winter can be on everyone. From colds to feeling fatigued, it can take a lot out of us. But it won't be long now, Spring is on it's way! Keep crafting and see you again soon enough. 


Tuesday, January 13, 2015

Winter makings

We have had cold, chilly days here. We have had a few of mixed flurries, then back to rain, then even in the 60's for a weekend! But during this time I try to stay motivated and work on a few projects.

Already for this year I have: finished the plushie owl, finished my fleece pull over (pictured below) and I now have two baby gifts to make for friends! I even found some lace to add to a dress, since I've been wanting to do something with it (but not give it a huge overhaul).

Simplicity pull over

Ahh, my wonderful warm fleece pull over! How I love it so ~ especially in this weather. This is pattern 9513 size HH (sizes 6 - 12). Now before you run to buy a clothing pattern please note: it is not sized as your purchased clothing is. It is always sized by your measurements, so you need to know your bust/waist/hip sizes. I went with a size 12 and it fits me just right, not too large or too small. This pattern called for fleece with stretch to it or else you would never get this on! I started out with adding a hood to this but... once I tried it on, I didn't care for it. So the hood came off and it's a pull over.

neck details

I used buttons and some leather strips for a closure. The pattern leaves it up to you, you can add something or leave it completely open. But I love buttons and bought these dark brown textured ones. 

side view of pull over

Be sure to follow the pattern on this one. It advises you to cut fabric in the direction it stretches, so it's easier to pull over. And expect a lot of 'fluff' to come off during cutting. If you don't want bits of fleece fluff all over your nice clothes, you might want to have a lint brush on hand. 


Above is my adorable selection of fabrics from JoAnn's. I tend to go when I have a few good coupons to use. Sometimes I receive ones that say a percentage off your total purchase, even clearance. The yoga/exercise girl fabric was on clearance so I grabbed that up fully intending to make something for my gym bag. The hedgehog fabric is flannel, I love working with it! It's perfect for things like hankies (for your nose) or other items you want soft, durable fabric. The birdies are cotton and the above two fabrics are for the baby blankets. The black lace will go on a solid black dress I have. Instead of sewing fabric sleeves I hope to use the lace as flutter sleeves instead.


Here are two hankies I made for myself. You can easily just sew two squares together, then turn them right side out. Or if you have bias tape (fabric binding tape, such as double fold) you can do as the blue one: just cut a square then use bias tape on the raw edges. It's an easy project for newbies and you can even play around with the fancy stitches on your machine. They can also be made as simple gifts for people, perhaps a small "thank you" gift or even a "get well" gift. 

I hope everyone has been feeling well and getting through this winter cold. I have some new listing in my etsy shop for Valentine's Day coming up! So be sure to shop early so items arrive in plenty of time. 

And in non-crafting news ~ I have become a big fan of the Japanese drama "Hanazakari no kimi tachi e" (Ikemen Paradise) ≧◠‿◠≦✌